Users
The Users page lets administrators manage all WMS user accounts. Each user can be assigned an authorization group, one or more warehouses, and an optional link to an external user record.
Route: Settings → Users
User List
Section titled “User List”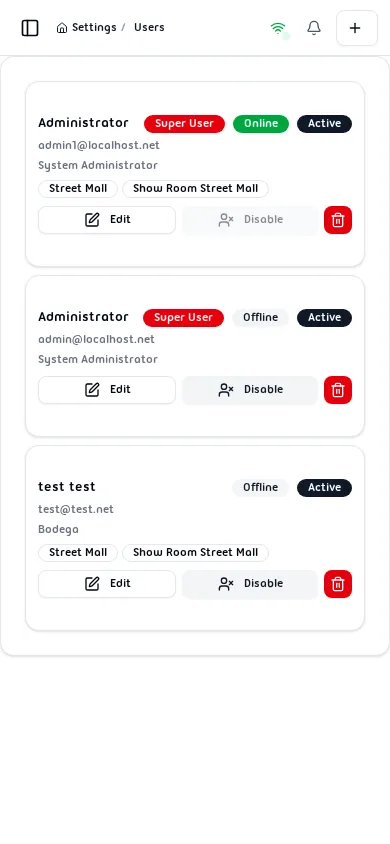
The table shows every user in the system with the following columns:
| Column | Description |
|---|---|
| Full Name | Display name used throughout the WMS |
| Email Address | Contact email (optional) |
| Position | Job title (optional) |
| Authorization Group | Assigned role group; shows Super User badge for super users |
| Warehouses | Badges for each assigned warehouse |
| Status | Active or Inactive |
| Online Status | Online (green) or Offline — updated in real time |
| Actions | Edit, Disable/Enable, Delete |
Click the + button in the top-right header bar to open the Add User form.
Adding a User
Section titled “Adding a User”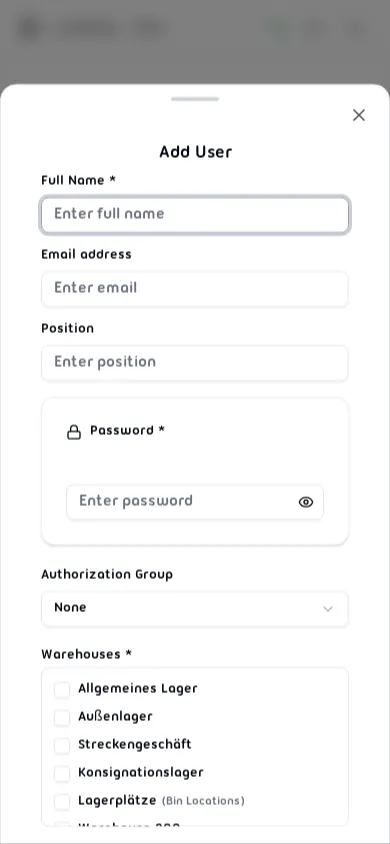
Fill in the form fields:
Left column
| Field | Required | Notes |
|---|---|---|
| Full Name | Yes | 2–100 characters |
| Email Address | No | Must be a valid email format |
| Position | No | Free-text job title |
| Password | Yes | Minimum 6 characters; use the eye icon to toggle visibility |
Right column
| Field | Required | Notes |
|---|---|---|
| Authorization Group | No | Select a group or leave as None |
| Warehouses | Yes* | Check at least one warehouse; each entry shows if bin locations are enabled |
| Super User | No | Grants unrestricted access; bypasses the warehouse requirement |
| External User | No | Link to an external user record to sync name and email |
*The warehouse requirement is waived when Super User is enabled.
Click Save to create the account, or Cancel to discard.
Editing a User
Section titled “Editing a User”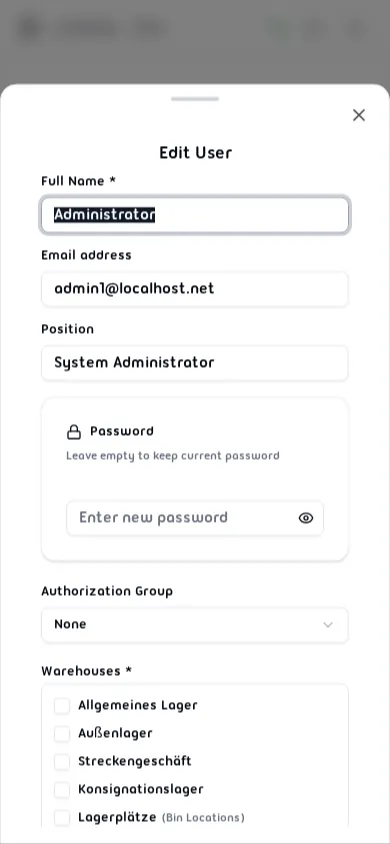
Click Edit next to any user to open the same form pre-filled with their current data. The password field is optional when editing — leave it blank to keep the existing password. The hint text reads “Leave empty to keep current password”.
Make your changes and click Save.
Disabling and Enabling a User
Section titled “Disabling and Enabling a User”Click Disable to deactivate an account. The button label switches to Enable for inactive users, allowing reactivation at any time. The current logged-in user’s own row has these buttons disabled to prevent self-lockout.
Disabled users appear in the list with an Inactive status badge and an Offline online-status badge.
Deleting a User
Section titled “Deleting a User”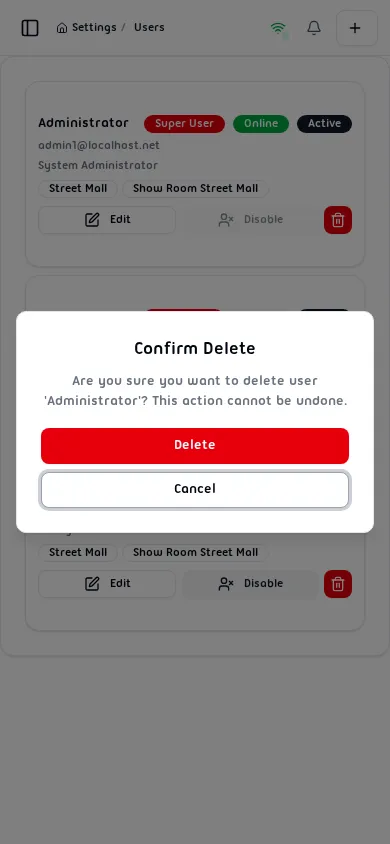
Click Delete next to a user to open the confirmation dialog. The dialog shows the user’s full name and warns that the action cannot be undone.
- Click Delete to permanently remove the account.
- Click Cancel to go back without making changes.
Warning: Deletion is permanent and cannot be undone.
Validation Rules
Section titled “Validation Rules”| Field | Rule |
|---|---|
| Full Name | Required, 2–100 characters |
| Email Address | Optional, must match valid email format |
| Password | Required on create, minimum 6 characters; optional on edit |
| Warehouses | At least one required unless Super User is enabled |